This feature is available on our 3.0.0 release and for all the sites hosted at
Yclas.com
Yclas allows you to include VAT to the orders. When users purchase Featured Ads, To Top, Pay to Post or Membership plans the VAT will be added at checkout. You can also configure your website in a way where users can enter their VAT number and the VAT will be added automatically at the checkout when they are selling their products.
Follow the steps below to add the VAT to the features of your website, Featured Ads, To Top, Pay to Post and Membership plans.
EU countries
- Login to your panel.
- Go to Settings -> Payment -> General.
- Enter the VAT country and VAT number.
- Click Save.
Once you click Save you should get a success message. If you get the following message it means that VAT country or number is wrong :
Error: Invalid EU Vat Number, please verify number and country match
Non EU countries
- Login to your panel.
- Go to Settings -> Payment -> General.
- Enter the VAT country, VAT number and VAT rate only for Non-EU countries.
- Click Save.
If you don’t know how to enable the Buy Now button, here’s how.
Sellers can enter their VAT number and include VAT at checkout when they are selling their products through your website. This can be done in two ways: using Advertisement Custom Fields or User Custom Fields.
At checkout, your website will try to calculate the VAT using the Advertisement VAT number, if it’s missing it will use the User VAT number and if that is missing too, then no VAT will be added on the amount.
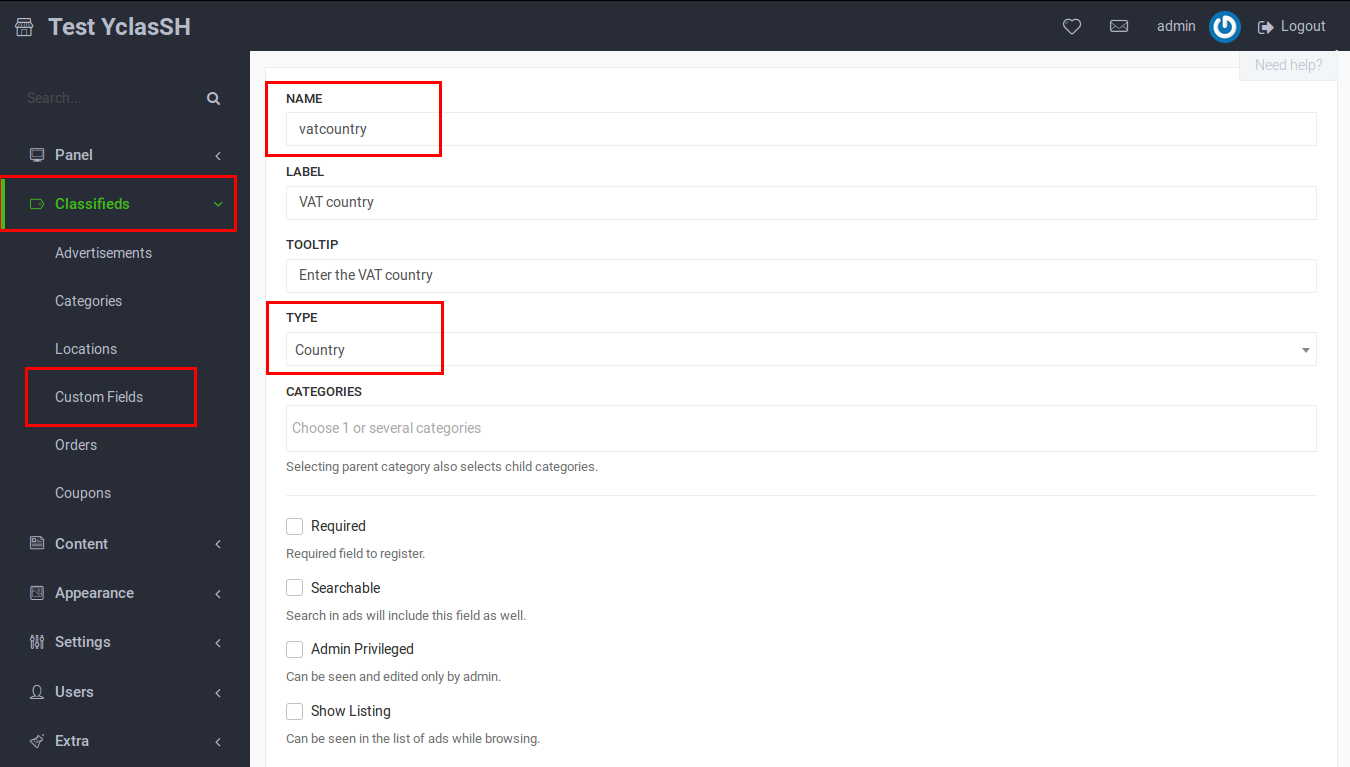
Advertisement VAT number
- Login to your panel.
- Go to Classifieds -> Custom Fields.
- Click New Field.
- Enter vatcountry into the field called Name. It’s important to enter vatcountry as name and choose Country as the field type in order to make the feature works. Choosing Country will automatically create dropdown menu with all the countries included.
- Fill the fields and press Create.
- Click New Field.
- Enter vatnumber into the field called “Name”. It’s important to enter vatnumber as name in order to make the feature works.

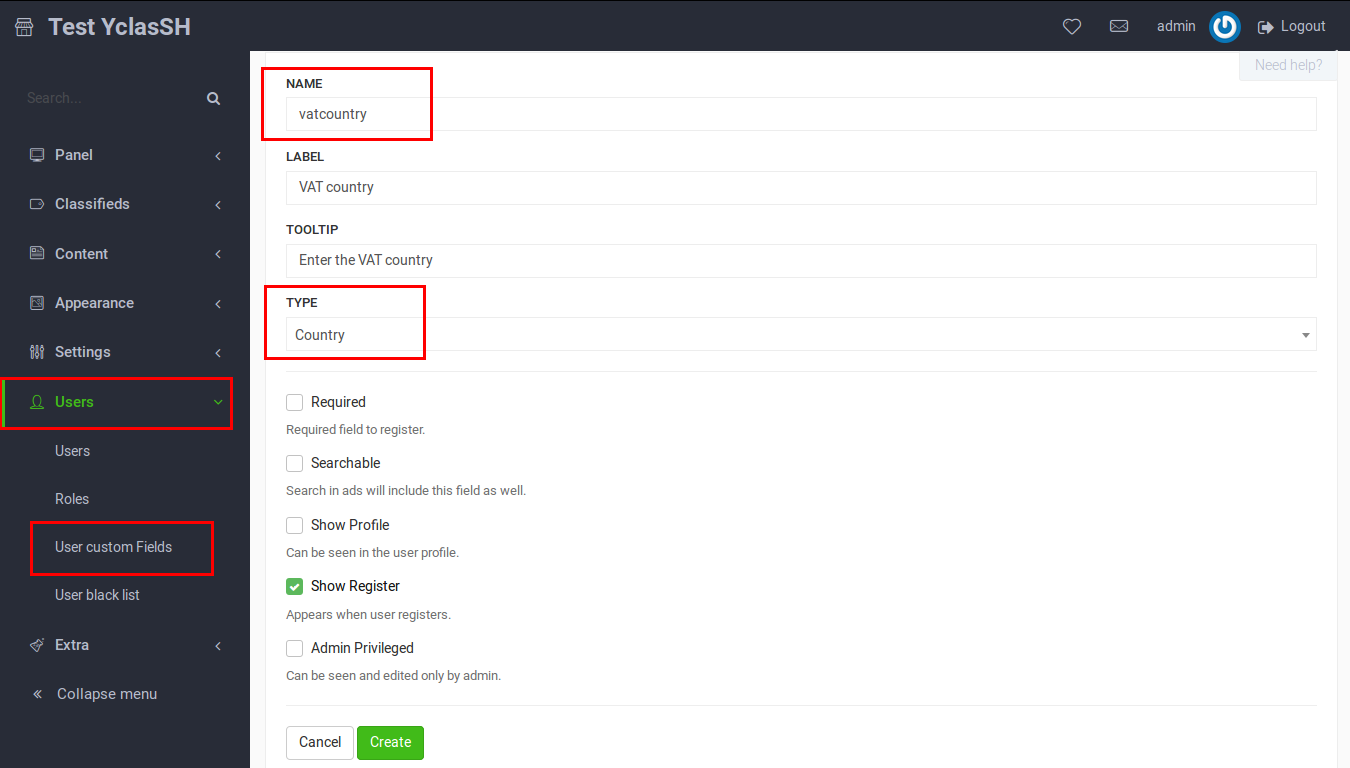
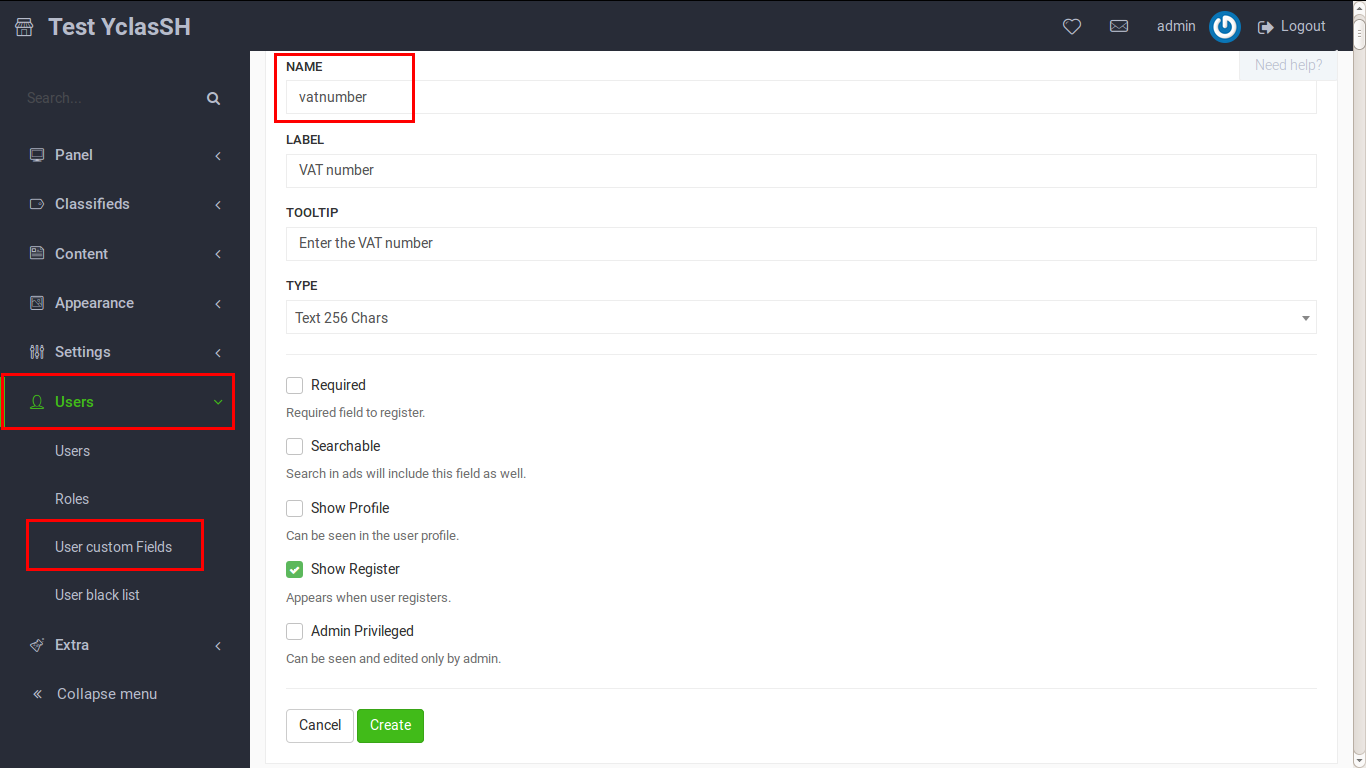
User VAT number
- Login to your panel.
- Go to Users -> User Custom Fields.
- Click New Field.
- Enter vatcountry into the field called “Name”. It’s important to enter vatcountry as name and choose Country as the field type in order to make the feature works. Choosing “Country” will automatically create dropdown menu with all the countries included.
- Fill the fields and press Create.
- Click New Field.
- Enter vatnumber into the field called “Name”. It’s important to enter vatnumber as name in order to make the feature works.
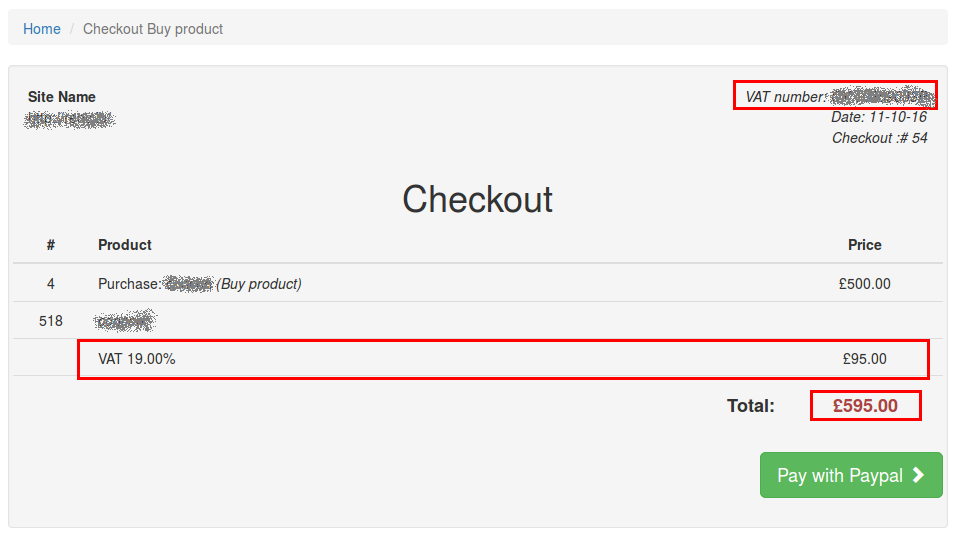
The checkout page
If the VAT country and the VAT number match, the checkout page will look like this.
VAT on automatic emails
Once you configure VAT to be added at checkout, you will be able to include it to the automatic emails ads-sold and ads-purchased.
The variables you can use are:
Includes the two-letter country code.
Includes the VAT number.
The VAT rate based on the seller VAT number.
VAT for non EU countries
If your selected country is an EU member, the VAT rate is calculated automatically. The solution we have for non EU countries is for the seller to add manually the VAT rate, in his user profile details or each ad details.
To let sellers manually insert the VAT rate, you need to create a custom field or user custom field called vatnoneu.
- Login to your panel.
- Go to Classifieds -> Custom Fields or Users -> User Custom Fields.
- Click New Field.
- Enter vatnoneu into the field called Name. It’s important to enter vatnoneu as name and choose Number Decimal in the field type to make this feature work.
- Fill the fields and press Create.
