This guide is only for Yclas Self Hosted!
This post is written to help you understand how to manage your way around our themes, modify a theme and, perhaps, create your own theme. In the following sections we explained theme architecture, HTML structure, file linking, styles and javascript.
Theme Architecture
Yclas Self Hosted 2.x software has a file structure driven from Kohana cascading file system; http://kohanaframework.org/3.2/guide/kohana/files.
Yclas Self Hosted software comes with s default theme, this theme is basic with some limitations. Default (Ocean FREE) contains all views/styles that Yclas Self Hosted software needs. To explain more lets understand content and file system of this theme.
Note: We will explain only major files and folders.
Main folder for the default theme:
/themes/default/
- /css (all markup styles)
- /img (placeholder for your style images)
(Update 2.1.4, now favicon is at public/yclas/images)
- (…)
- /js (placeholder for your plugins and custom js/jquery code)
- oc-panel (javascript files for admin panel)
- crud
- stats
- dashboard.js (jquery script for stats)
- (…) list of specific js files for some major functionalities of admin theme
- theme.init.php
- new.js
- (…) rest of the plugins
- /view (front end php markup files)
- oc-panel (all view php files for admin panel)
- pages (main content views)
- ad (advertisement views)
- disqus.php
- listing.php
- map.php
- new.php
- single.php
- auth (authentication files)
- login.php
- login-form.php
- (…)
- blog (same as ad)
- error (page error style)
- contact.php
- home.php
- maps.php
- userprofile.php
- footer.php
- header.php
- main.php
- (…)
- init.php
Now we have a general overview of the files. Let’s talk about how everything is put together. Yclas have admin theme and front end (user) theme. Admin views can be found in default/views/oc-panel folder.
But, in this article, we will focus on our front end templates. So as you can realize by now, all other files and folders are related to front end views (except those stored in oc-panel folders).
We use bootstrap framework (Bootstrap 2 http://getbootstrap.com/2.3.2/, Bootstrap 3 http://getbootstrap.com/), that nowadays it is almost a standard in website templating. In order to understand our template, we encouraging you to visit their website and learn more about Bootstrap.
HTML
Let’s consider following image. This image is a screenshot of our homepage. As you can see there are 4 main sectors HEADER, MAIN CONTENT, Placeholder-LEFT (widgets Placeholder), FOOTER.
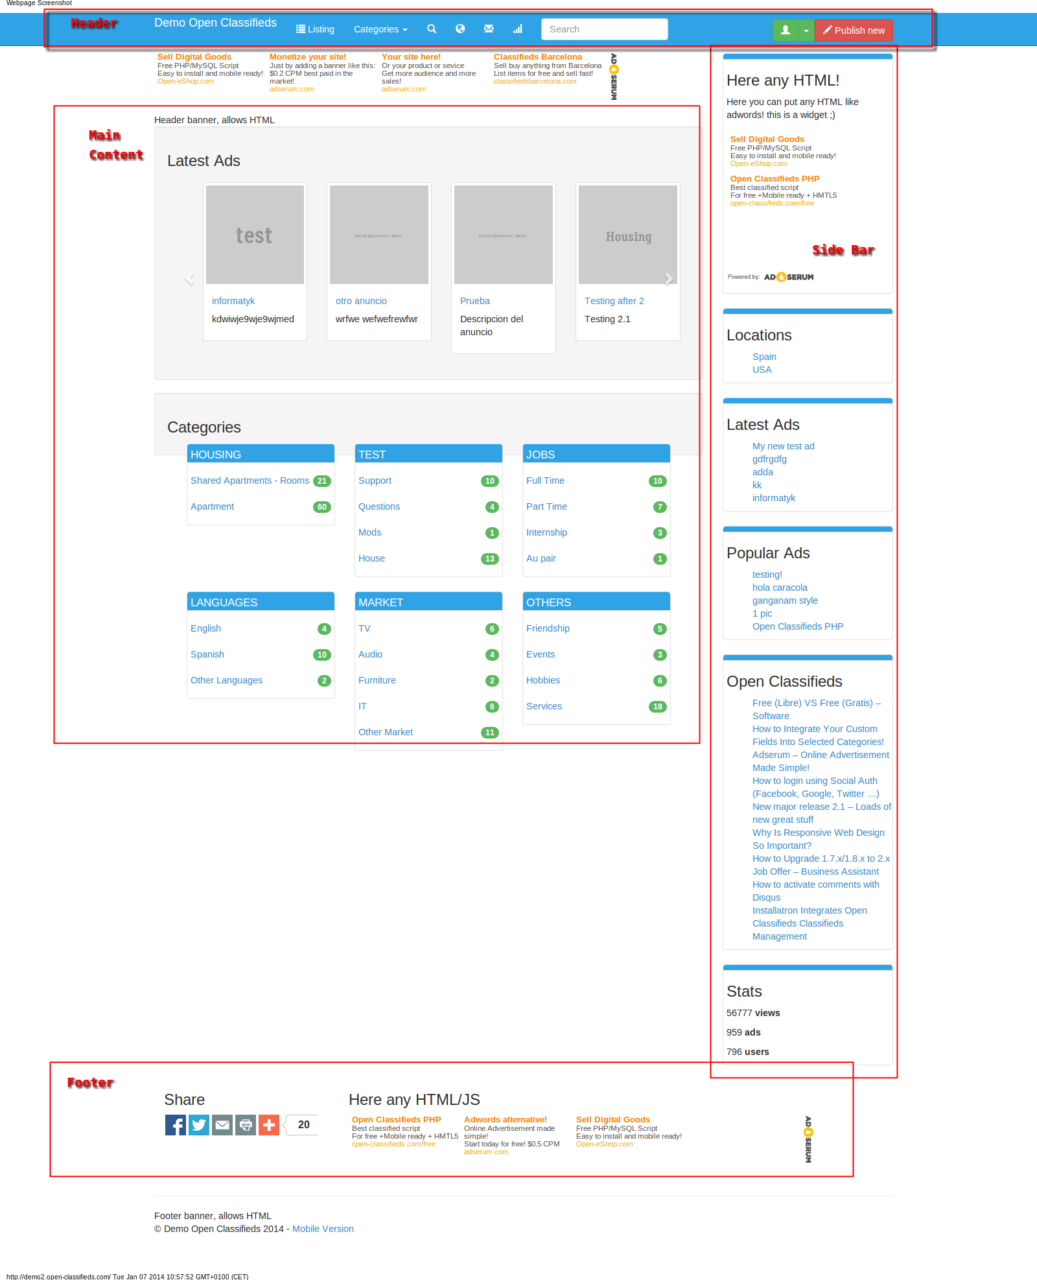
Please note that the header, footer, widget-placeholders are static parts of mark-up, they don’t change content.
But Main content is dependant on the page you are in. And all mark-up files could be found in themes/views/pages. The one related to advertising are in theme/views/pages/ad.
File Linking
First thing you need to know is that all styles and javascript/jQuery (http://jquery.com/) files are linked in init.php. Look at this example:
css linking
Theme::$styles = array( ‘http://netdna.bootstrapcdn.com/bootstrap/3.0.2/css/bootstrap.min.css' => ‘screen', 'css/styles.css?v=2.1′ => ‘screen');
js linking
Theme::$scripts['footer'] = array(‘http://ajax.googleapis.com/ajax/libs/jquery/1.10.2/jquery.min.js', 'http://netdna.bootstrapcdn.com/bootstrap/3.0.2/js/bootstrap.min.js');
These are two arrays for css and js files, if you want to include more of your own this is the right place to do so. Then they are passed in views/main.php document.
<?=Theme::styles($styles)?>

<?=Theme::scripts($scripts)?>
and just after the footer js files.
<?=Theme::scripts($scripts,'footer')?>
Styles
All styles could be found in css folder as well as the relevant files for this article - the file name is style.css.
Since we are using Bootstrap, as previously mentioned, this file contains only general styles that are overwriting bootstrap ones. And extra styles to suit the needs of our software.
Style.css is always included after bootstrap, as you can see in example above. But this IS a right place to add your own styles. Unless you want to add your own!?
JavaScript
There are 2 important files you must check: theme.init.js and init.php. Js file theme.init.js, is our placeholder that activates all major plugins, or holds some small scripts related to individual themes (e.g. Alert cookies).
And init.php, as we already discussed holds file internal linking.
So lets take Chosen plugin, e.g. http://harvesthq.github.io/chosen/.
First let’s get Chosen files, you can do it locally or externally. Locally save Chosen files previously downloaded, and save theme in js directory. And then open init.php, and link your new files.
Then we need to activate Chosen, go to js/theme.init.js and add following line.
If you don’t remember how, refer to File linking section again, and include these two lines.
External
‘http://cdn.jsdelivr.net/chosen/0.9.12/chosen.css' => ‘screen'

‘http://cdn.jsdelivr.net/chosen/0.9.12/chosen.jquery.min.js'
This will activate Chosen for all HTML select elements on the page.
We hope this article comes of some benefit to any of you out there thinking of having your own design and building your own idea. Await more beneficial articles from Yclas team soon! And let us know if you have any feedback :)
Best regards from Slobodan and Yclas team!
Second part here