The maximum number of Custom Fields you can have in your website is 65!
The new feature is included in the 2.0.7 version, which makes it possible to create multiple new custom fields.
Now there are 3 types of fields that cna be added to advertisements.
1. Standard: mandatory and not changeable.
Title, Category, Description.
2. Optional: they are part of the open-classifieds. You have the possibility to turn them on/off
Phone, Website, Location, Address, Price, Captcha, Upload file.
3. Custom: Fully customizable.
Create New Field
To create a new field, go to Admin Panel, press Classifieds select Custom Fields option.
Then click New Field button on the right corner.
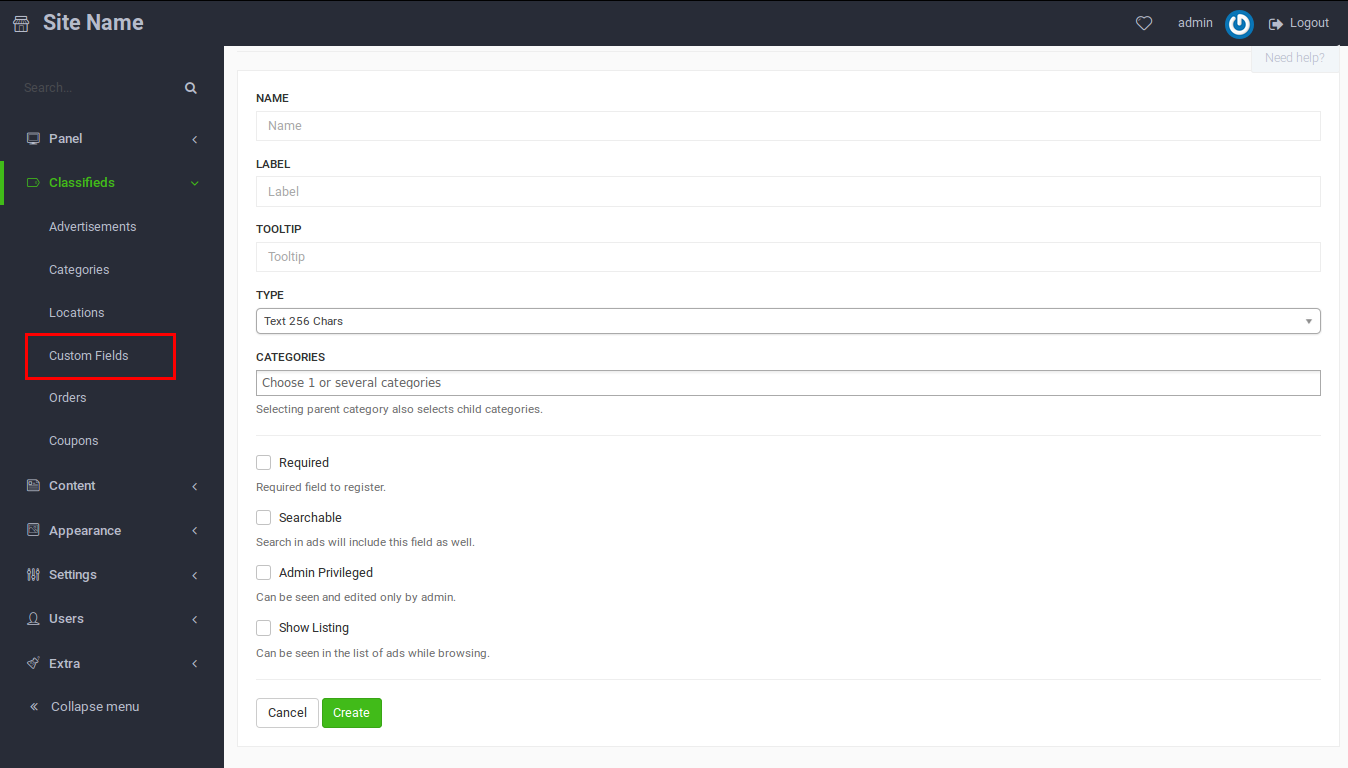
This is a New Custom Field screen. There are 10 options in total.
- Name: give a name to field.
- Label: will appear in the form of “Post new ad”, “Edit ad”, and “Advanced search”.
- Tooltip: assign a text to the custom field tooltip.
-
Type:
1. Text 256 chars (standard input field, string)
2. Text (textarea field, string)
3. Text BBCode (textarea field with bbcode, formats BBCode tags)
4. Number (small integer number)
5. Number Decimal (floating point number)
6. Money (formats number to money)
7. Date (date picker, with plugin)
8. Select (select field)
9. Radio (radio buttons)
10. Checkbox (checkbox buttons)
11. Checkbox Group (multiple checkbox buttons)
12. Email (validates email input and creates email link)
13. Country (creates a dropdown menu with all the countries included)
14. URL (creates a link)
15. Video (uploads a video to Cloudinary and embeds the video)
16. File Dropbox (attaches a file from Dropbox and creates a link)
17. File Google Drive (attaches a file from Google Drive and creates a link)
5. Values:
Note: It only appears to select and for the radio option.
To create values,write them down followed by comma (e.g. Paris, London, Madrid, Others).
6. Categories: the category that the New Custom Field should be applied to.
( see: How to Integrate Your Custom Fields Into Selected Categories!)
7. Required: this will make it a required field needing validation.
8. Searchable: this makes the field searchable.It will appear in Advanced searchs too.
9. Admin privileged: this field can be seen and edited only by the admin.
10. Show listing: Users will see the custom field in listings view without having to enter the ad.
Once you have written down all the required information, click Create. New field is created and added to database, and it will appear in Post new ad, Edit ad and Advanced search.
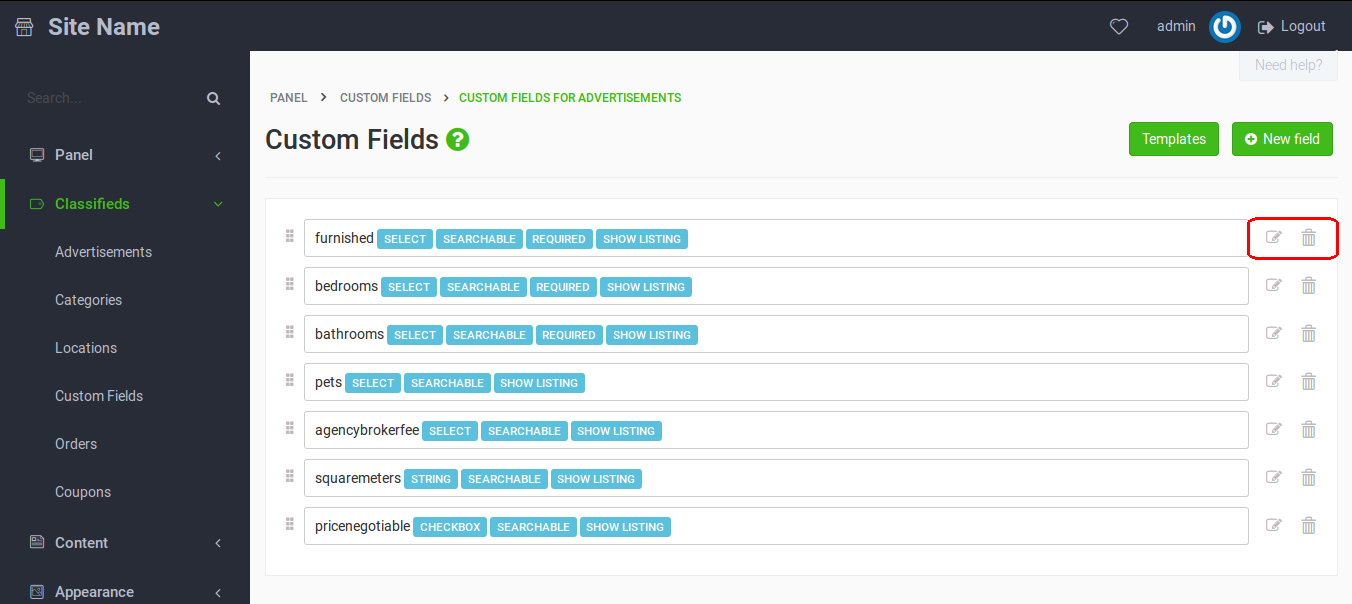
To Edit, Delete or Change order look at the following image.
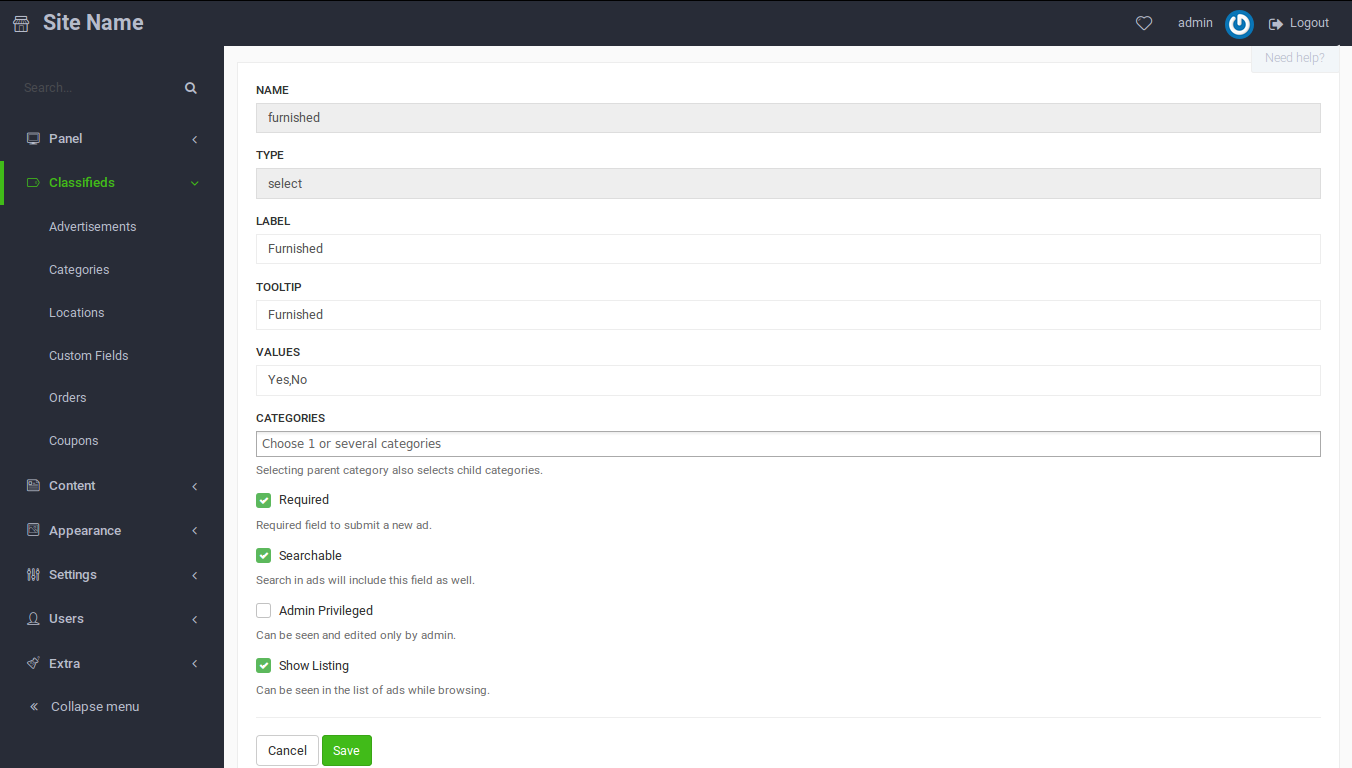
Edit Custom Field
While editing, Name and Type fields will become disabled. In case you want to change them, you will have to delete this custom field and start over. This is to prevent messing up with the DataBase.
Just for your information, the rest of the options are still open for editing and adding.
Video
Tricks